|
|
Six Easy Steps to Makizushi!Right – now that you know more about it, it’s time to learn how to make sushi! We’re going to look at the most common kind, Maki Sushi (Roll Sushi)
Things you'll need to make sushi – you should be able to find all of these things at your local Countdown or New World Supermarket. I have struggled sometimes to find the right stuff at Pack ‘N Save. A. A bamboo sushi rolling mat B. Nori sheets C. Sushi Rice D. Fillings
|
The Steps:
1.
Feel both sides of the nori sheet and you will see that one side is smooth and the other a little rough. Lay the nori on your bamboo mat with the smooth side down.
2.
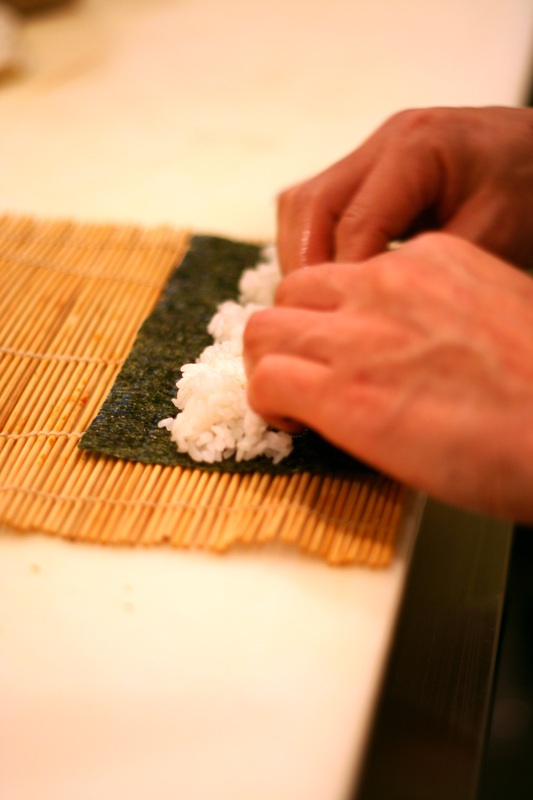
With wet hands, grab a handful of rice. (Advice – when handling the rice your hands should be wet because the rice is sticky. When touching nori they must be dry. Keep a bowl of water with a little bit of added rice vinegar and a hand towel close!)
3.
Place the handful of rice in the middle of the nori sheet, and spread it equally across the nori. The nori sheet should be almost completely covered by the rice, but make sure there is a ‘rice free’ area along the top – give yourself about 2cm. This is so you can roll the sushi properly. (Advice – just spread – don’t squish or compress too much rice onto the nori).
4.
Lay your ingredients from one end to the other along the edge of the nori. Don’t use too much – just 1 ~ 2 cm thick is enough. Sometimes just 1 ingredient is best to practice with. When you can roll your sushi well, then you can add extras, but still it’s best to use only 2 or 3 ingredients at most.
5.
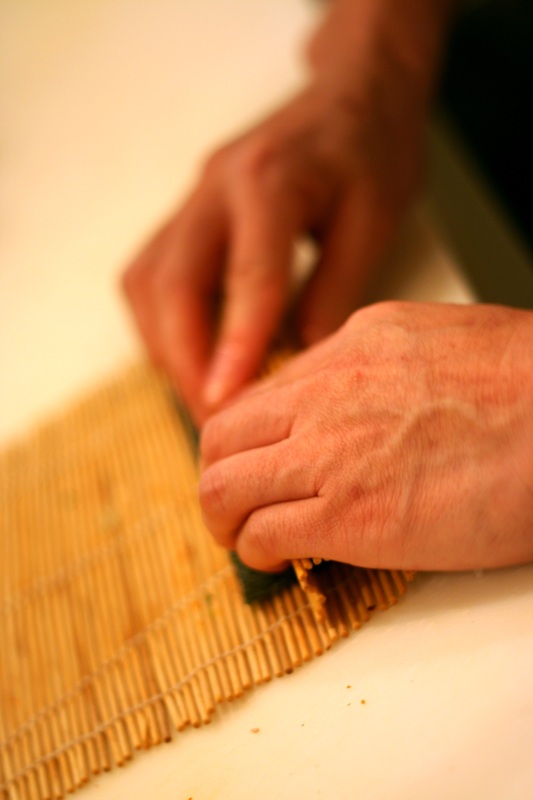
This is tricky. Using the edge of the rolling mat closest to you, close on the filling with the nori making a rectangular shaped hill and tighten it from above. Continue rolling using these rectangular hill steps, keeping it tight with every move until you reach the end of the nori. Put pressure on the roll from all three sides at all time, especially on stops to allow it to roll tightly.
6.
Use a wet, sharp knife to cut! ENJOY!
Feel both sides of the nori sheet and you will see that one side is smooth and the other a little rough. Lay the nori on your bamboo mat with the smooth side down.
2.
With wet hands, grab a handful of rice. (Advice – when handling the rice your hands should be wet because the rice is sticky. When touching nori they must be dry. Keep a bowl of water with a little bit of added rice vinegar and a hand towel close!)
3.
Place the handful of rice in the middle of the nori sheet, and spread it equally across the nori. The nori sheet should be almost completely covered by the rice, but make sure there is a ‘rice free’ area along the top – give yourself about 2cm. This is so you can roll the sushi properly. (Advice – just spread – don’t squish or compress too much rice onto the nori).
4.
Lay your ingredients from one end to the other along the edge of the nori. Don’t use too much – just 1 ~ 2 cm thick is enough. Sometimes just 1 ingredient is best to practice with. When you can roll your sushi well, then you can add extras, but still it’s best to use only 2 or 3 ingredients at most.
5.
This is tricky. Using the edge of the rolling mat closest to you, close on the filling with the nori making a rectangular shaped hill and tighten it from above. Continue rolling using these rectangular hill steps, keeping it tight with every move until you reach the end of the nori. Put pressure on the roll from all three sides at all time, especially on stops to allow it to roll tightly.
6.
Use a wet, sharp knife to cut! ENJOY!
Disclaimer: We've tried to make the information on this web site as accurate as possible, but it is provided "as is" and we accept no responsibility for any loss, injury or inconvenience sustained by anyone resulting from this information. You should verify critical information with the relevant parties before dining.